Desktop.ini comes as a humble icon

Desktop.ini is actually a malware which can sneak into your PC without any knowledge and permission. Usually, it comes bundled with free programs. Even when you see it on your desktop, you may probably take it slightly. See from the screenshot? Like a system file. Its appearance is so humble that users won't link it to a malware.
Want a quicker way to solve it? >>Click for the best removal tool.
Harmful properties of Desktop.ini
- People may be cheated by its appearance and keep it on their PCs.
- It can change its name randomly which makes it difficult for users to find it out.
- Some anti-virus programs can detect it out but fail to fully remove it.
- It may add many .ini extension files on users' desktop and folders to smear them.
- Desktop.ini's stubborn enough and can generate again and again.
- It collects your confidential information for unknown purpose.
- It makes a healthy machine move like a snail.
Get rid of Desktop.ini with efficiency
Solution one: Manually remove it by following the guides bellow.
Solution two: Automatically remove it by using SpyHunter.
Manual Ways
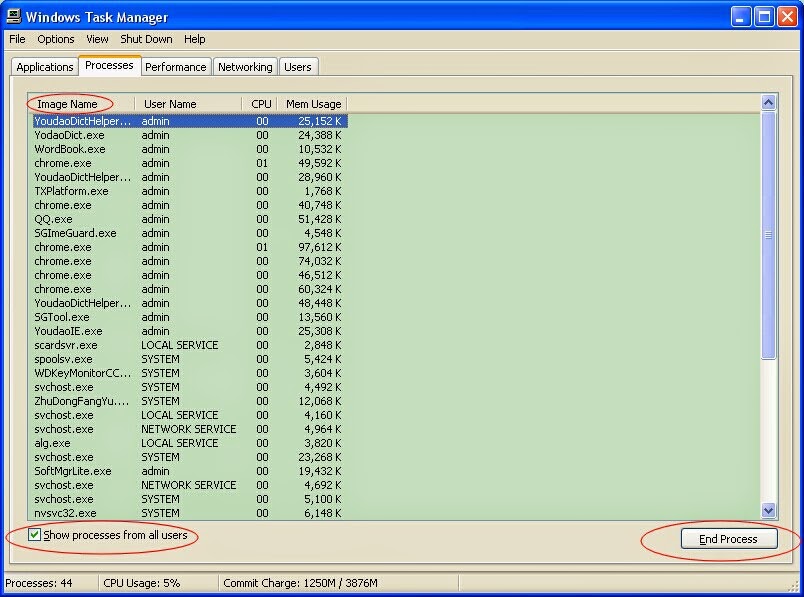
Step 1: Stop it from running on your PC.
To quickly open the box, press Ctrl+Shift+Esc or Ctrl+Alt+Del simultaneously. You can also click Start to find Run. Input "taskmgr" and hit "OK" to pop-up the interface. Select related programs in the view tab and end them.
Step 2: Uninstall related programs of Desktop.ini.
For Windows XP: Start>>Control Panel>>Add or Remove Programs.
For Windows 7: Start>>Control Panel>>Programs and Features.
For Windows 8: Start>>Control Panel>>Uninstall a Program.
Choose your way and uninstall the malware from your system.
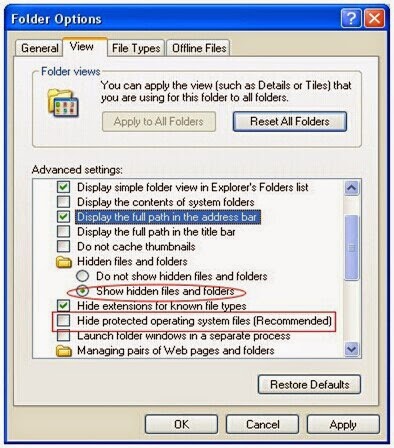
Step 3: Show hidden files and delete related files.
Start>>Control Panel>>Appearance and Themes>> Folder Options>>View tab.
Tick "Show hidden files and folders" and deselect "Hide protected operating system files (Recommended)". And then click OK. Since all the hidden files have been shown, you can easily find and delete them.
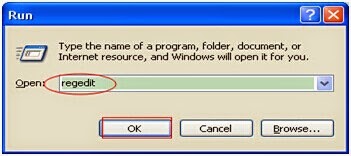
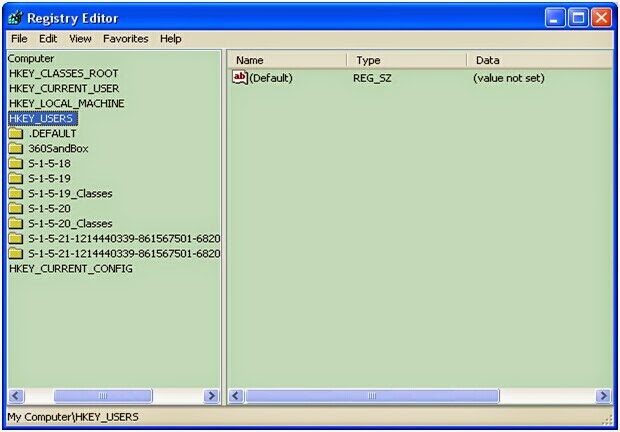
Step 4: Remove all related registries from Registry Editor. (You need to be cautious during this step.)
Press Win+R key to open the Run box. Type "regedit" in the pop-up box and hit OK to open the Registry Editor. And then remove all related or suspicious registries.
To quickly open the box, press Ctrl+Shift+Esc or Ctrl+Alt+Del simultaneously. You can also click Start to find Run. Input "taskmgr" and hit "OK" to pop-up the interface. Select related programs in the view tab and end them.
Step 2: Uninstall related programs of Desktop.ini.
For Windows XP: Start>>Control Panel>>Add or Remove Programs.
For Windows 7: Start>>Control Panel>>Programs and Features.
For Windows 8: Start>>Control Panel>>Uninstall a Program.
Choose your way and uninstall the malware from your system.
Start>>Control Panel>>Appearance and Themes>> Folder Options>>View tab.
Tick "Show hidden files and folders" and deselect "Hide protected operating system files (Recommended)". And then click OK. Since all the hidden files have been shown, you can easily find and delete them.
C:\Windows\Temp\<random>.exe
%temp%\<random>.exe
C:\Program Files\<random
Step 4: Remove all related registries from Registry Editor. (You need to be cautious during this step.)
Press Win+R key to open the Run box. Type "regedit" in the pop-up box and hit OK to open the Registry Editor. And then remove all related or suspicious registries.
Automatic Ways
SpyHunter is an advanced removal tool with the function of removing rogues, Trojan horses, rootkits, worms, adware and so on. Download the tool to stop Desktop.ini now!
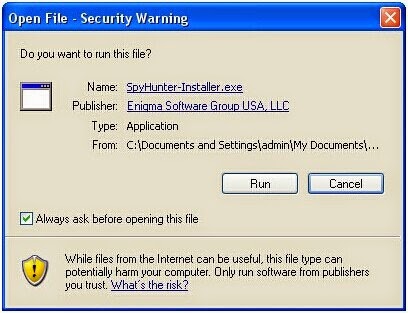
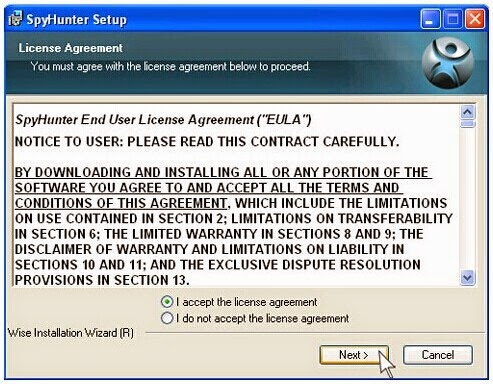
Step 1: Download SpyHunter.

Run the downloaded file to install it properly.
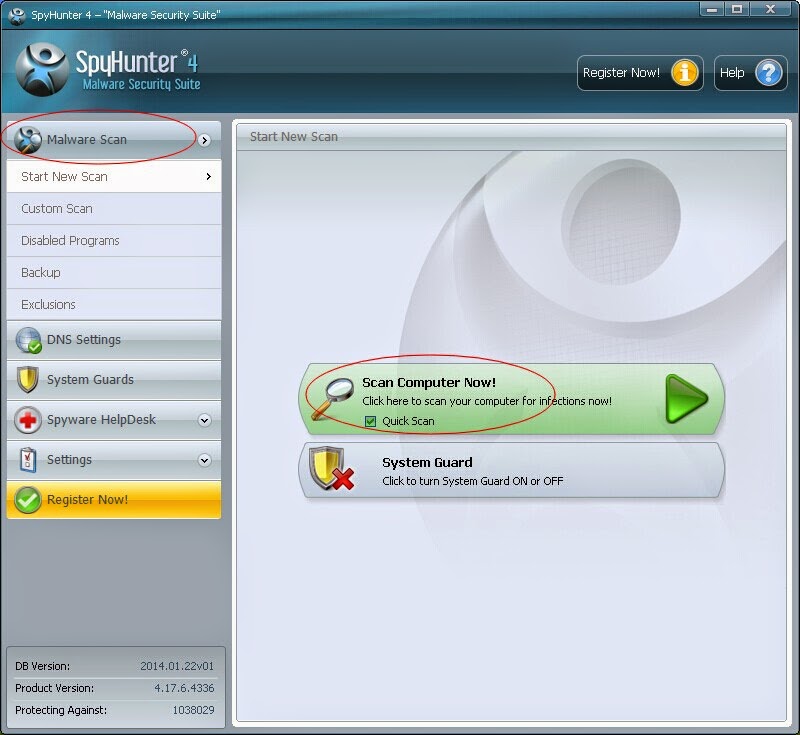
Step 2: Run SpyHunter and make a full scan for your computer.
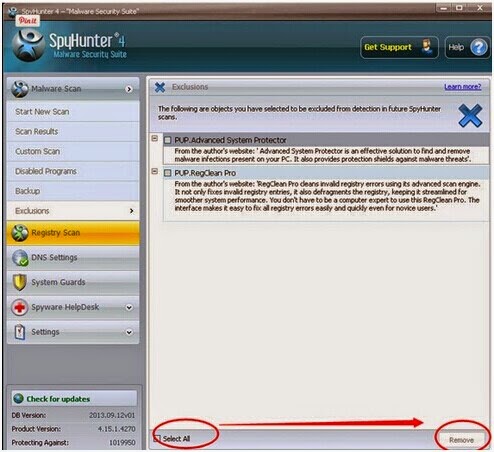
Step 3: Tick "Select All" and click "Remove".
Optional steps to check and optimize your PC
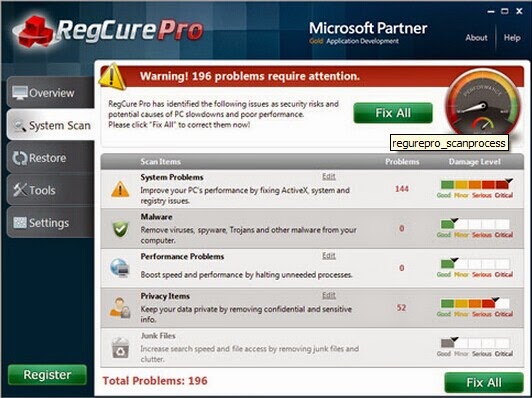
Developed by ParetoLogic Inc, RegCure is specialized in dealing with registry entries. It has the function of restoring errors like Windows update error, and files with the suffix name "dll" or "exe". Let it serve you now.
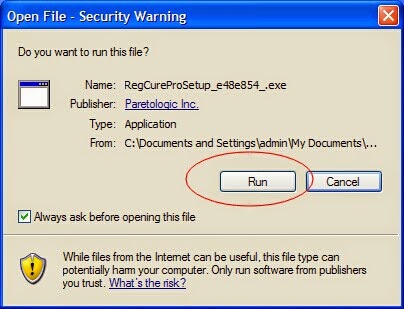
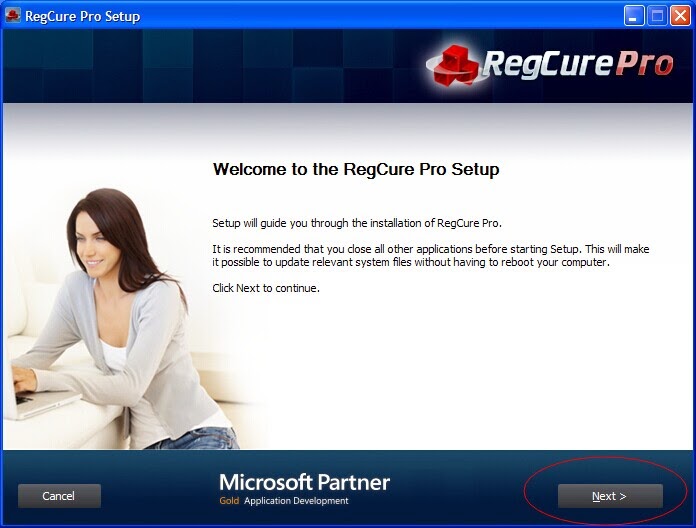
Step 1: Download RegCure now!

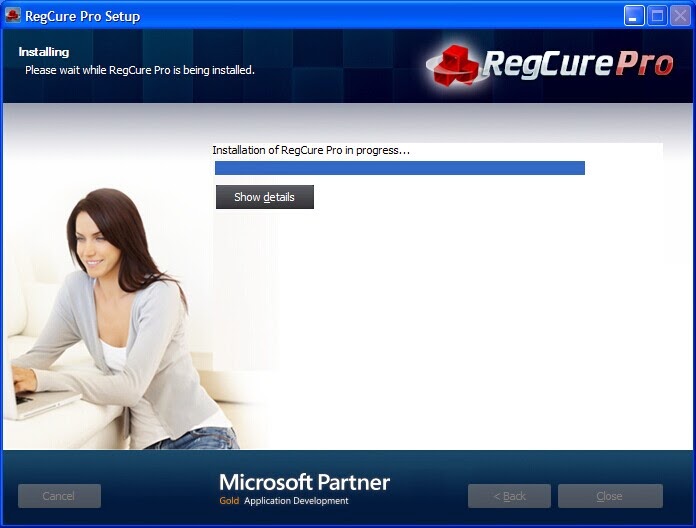
Step 3: You need to scan your PC after the installation.
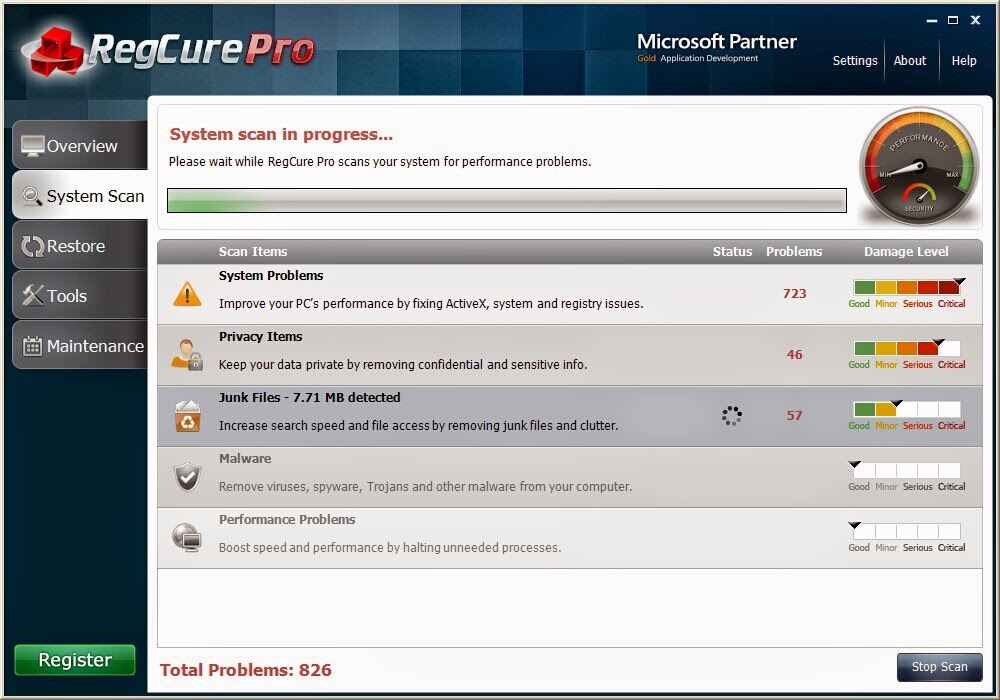
Step 4: If you do find anything, click "Fix All".
Note:
The malware is really dangerous. Don't hesitate to remove it.
There are effective ways to get rid of Desktop.ini. One way is that you can remove it manually yourself if you are a computer expert. Another way is you can use SpyHunter to remove it automatically.
For clean master to check and optimize your PC, please click here to get RegCure.
For more information, please click here:
Completely Remove Trojan C:\Windows\assembly\GAC_MSIL\Desktop.ini (Desktop.ini Virus Manual Removal)
No comments:
Post a Comment